
Bathroom Storage | Nail Polish Shelf
If you’ve ever shared a bathroom with teenagers, you know how quickly the counter space can disappear! Between nail polish, hair products, and all those little beauty supplies, finding a place to keep everything organized can be a challenge.
When my two teenage girls were sharing a bathroom, I decided it was time to create a little extra storage. I wanted something that would keep their nail polish organized and make it easy to see all the different colors. I also wanted a spot for some of their hair products.
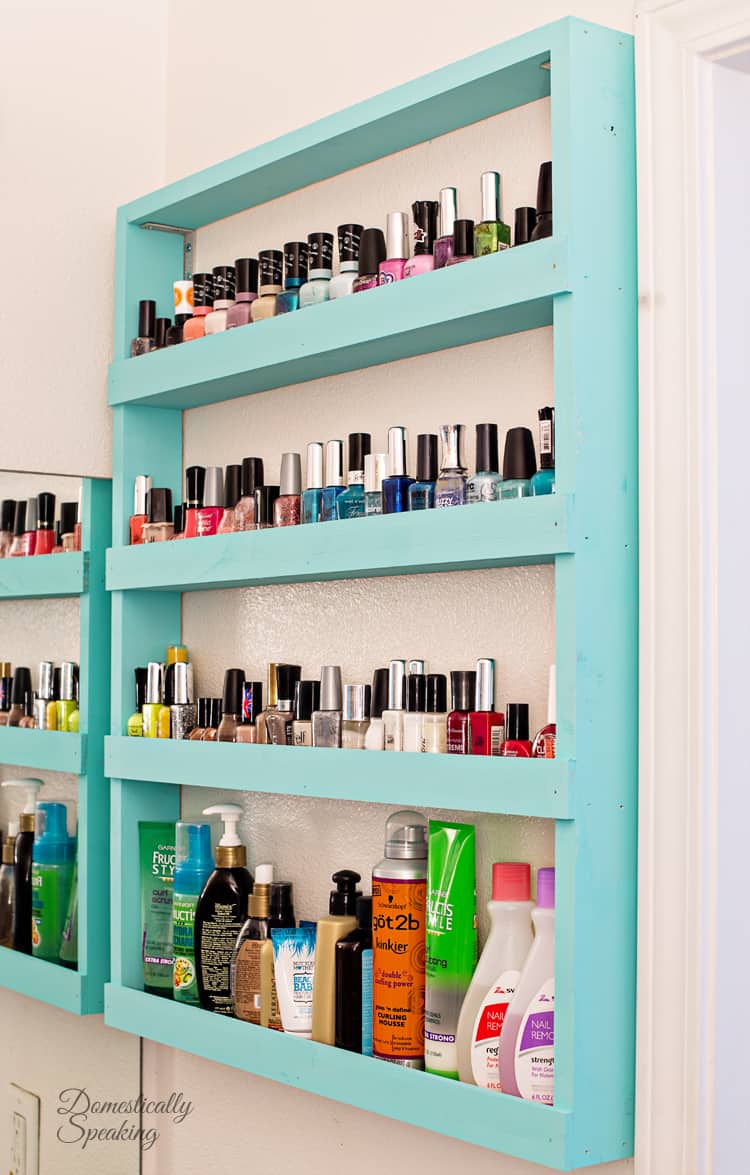
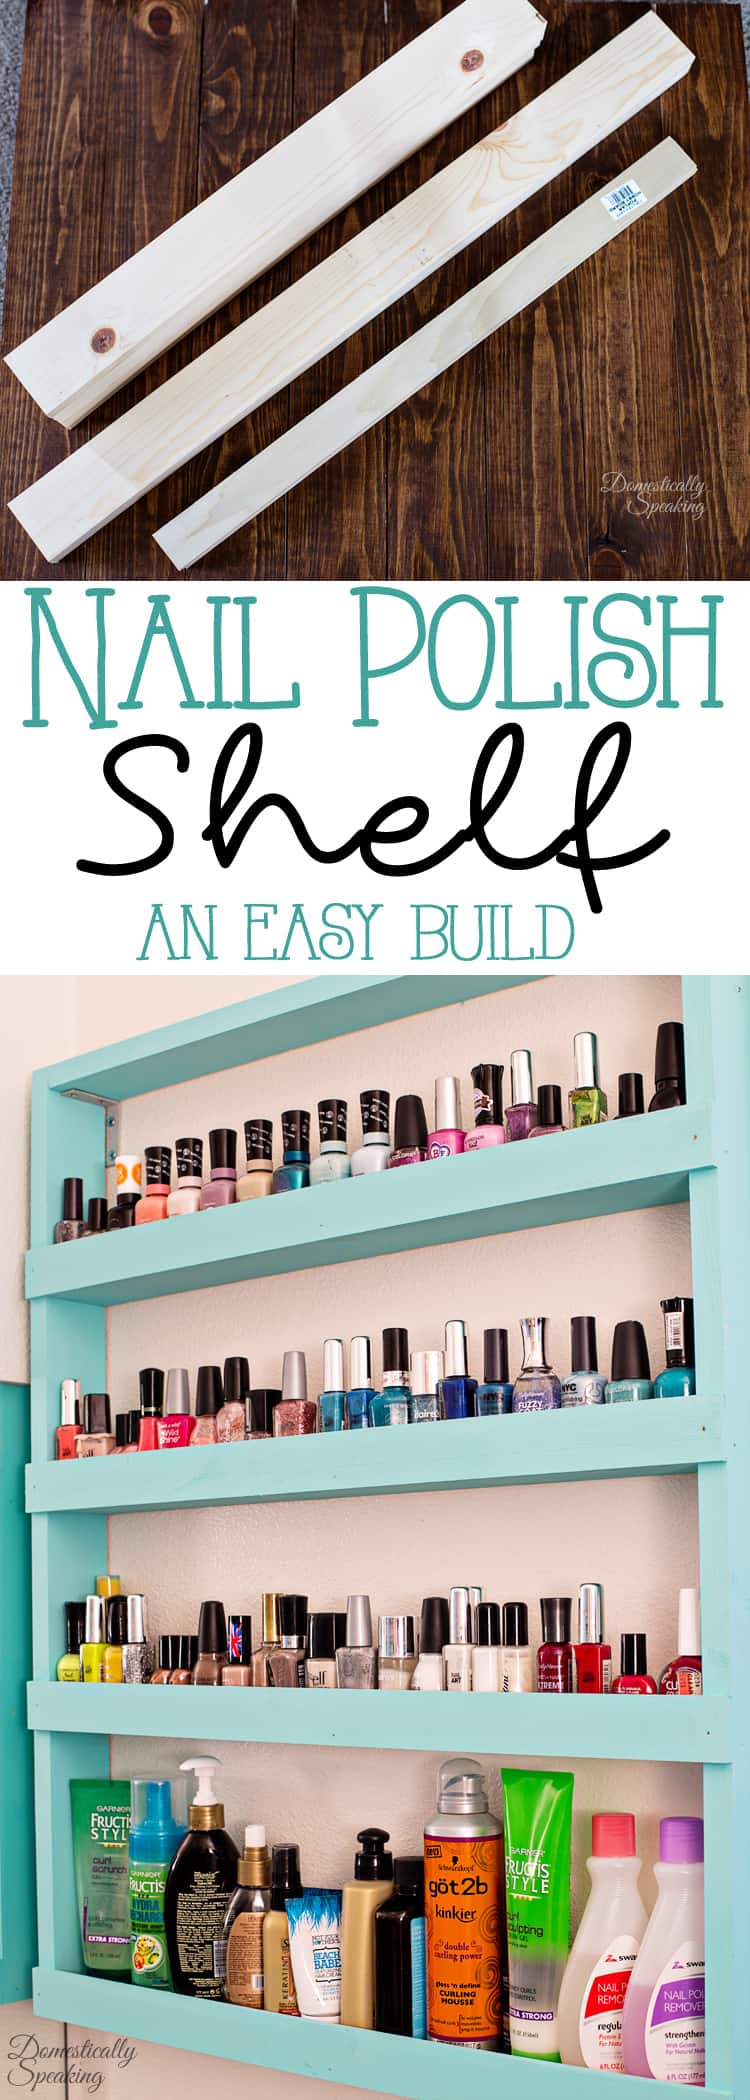
So I built this simple DIY Nail Polish Shelf!
This wooden wall shelf is an easy storage solution for a bathroom, and it could work just as well in a craft room for storing paint bottles or other small supplies. I painted mine a pretty teal, but you can choose a color that works with your own space.
Why You’ll Love This DIY Nail Polish Organizer
- Uses wall space: Keep nail polish and small products organized without adding more clutter to your bathroom counter.
- Keeps everything visible: The open shelves make it easy to see and grab the color or product you’re looking for.
- Easy to customize: Choose a paint color or finish that coordinates with your bathroom.
- More than nail polish storage: Use it for hair products, craft paint, or other small items.
- A straightforward woodworking project: The shelf is made from basic boards and assembled with a nailer.
Supplies for the DIY Nail Polish Shelf
(this post contains affiliate links)
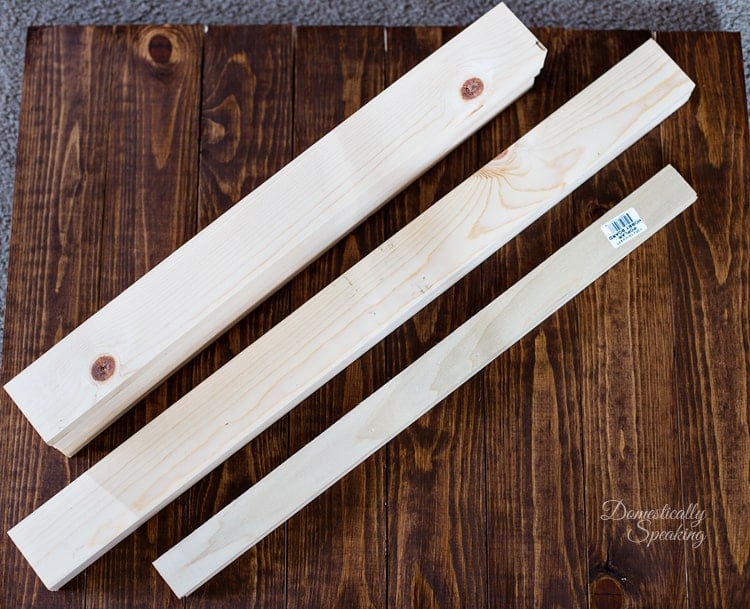
- three 3″ x 6′ x .75″ boards
- two 1.5″ x 4′ popular hobby boards
- Nail gun and nails
- Saw
- Measuring tape
- Pencil
- Paint and painting supplies
Wood Cuts for the Nail Polish Storage Shelf
Before assembling the shelf, cut your boards to size.
- cut five 22.5″ pieces from your 3″ x 6′ boards
- cut two 30″ pieces from your 3″ x 6′ boards
- cut both of your popular hobby boards in half giving you four 2′ pieces
The 22½-inch pieces are the horizontal sections of the shelf, including the top, bottom, and shelves. The two 30-inch pieces form the sides.
How to Build a DIY Nail Polish Shelf
Step 1: Cut Your Boards
Measure and cut the boards according to the cut list above. Lay the pieces out before assembling so you can identify the sides, horizontal sections, and front shelf edging.
Step 2: Assemble the Shelf
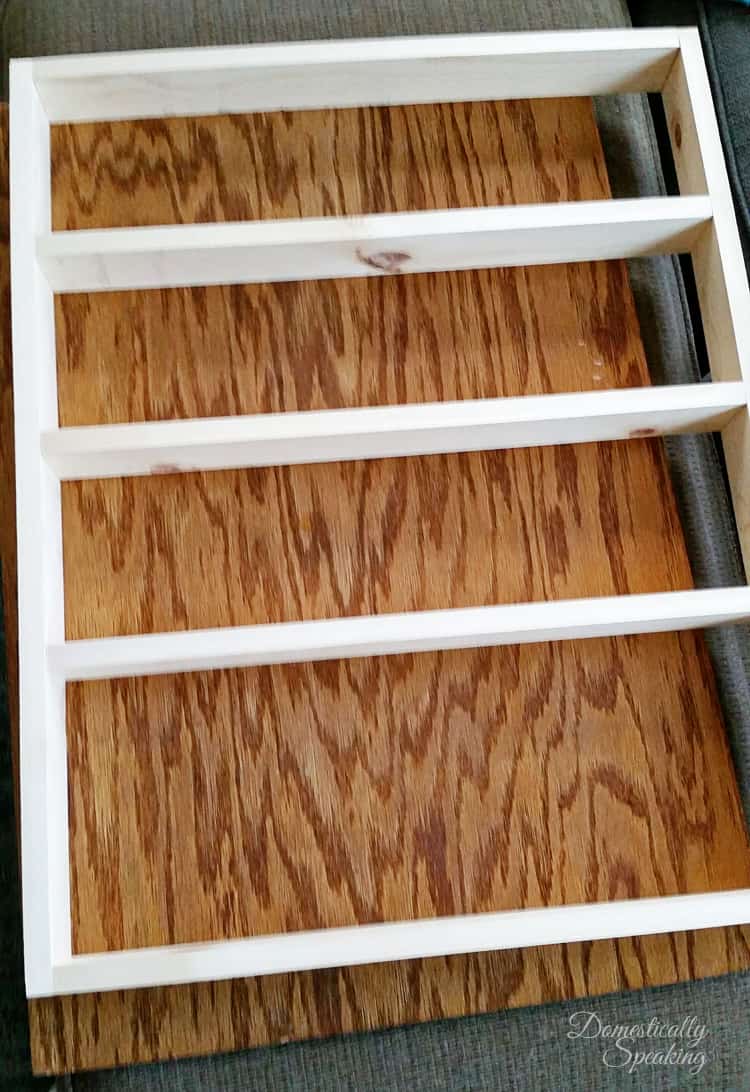
Use the two 30-inch boards as the sides and attach the 22½-inch horizontal pieces between them. These pieces form the top, bottom, and shelves.
I used my nailer to attach the boards. Work on a flat surface and check that the shelf stays square as you assemble it.
Step 3: Add the Front Edges

The smaller poplar hobby boards create a little lip along the front of the shelves. Position each piece flush with the bottom of its shelf, then attach it with the nailer.
That small raised edge helps keep the nail polish bottles from falling off when you’re reaching for a color.
Step 4: Paint the Shelf
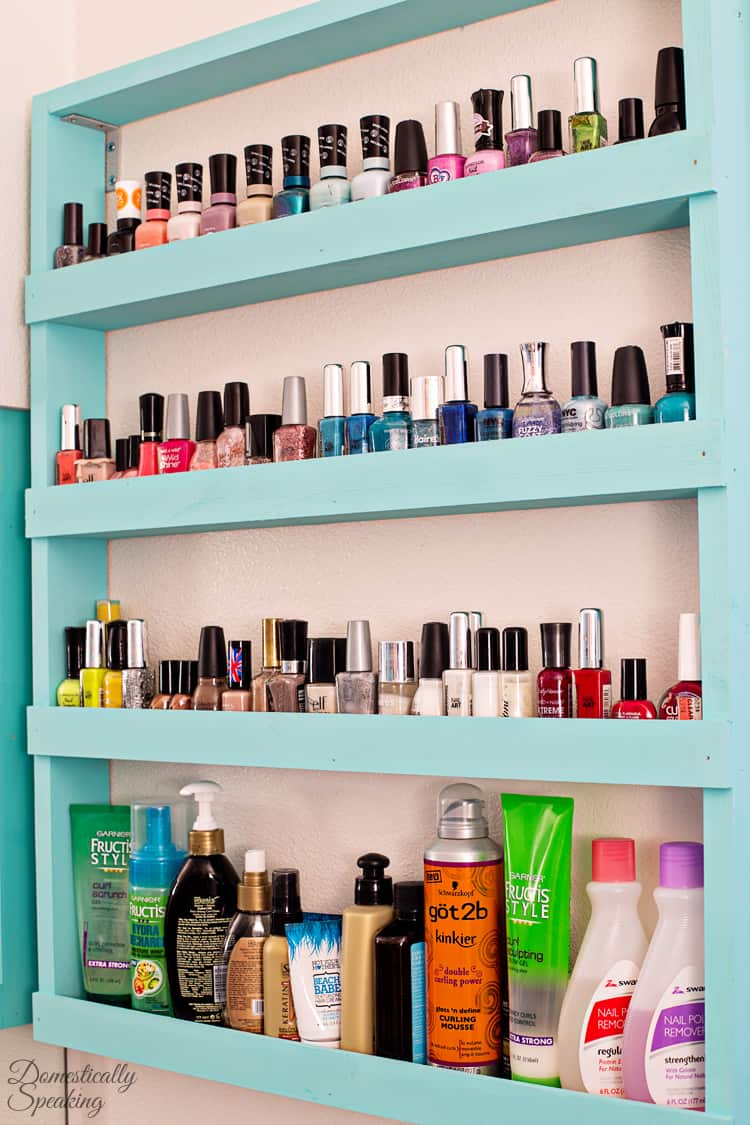
Once the shelf was assembled, I gave it a coat of beautiful teal paint. You could use any color you like, or stain the wood for a more natural look.
Allow the finish to dry completely before loading the shelves with your products.
Organizing Nail Polish and Bathroom Products
I installed the shelf in the bathroom to give the girls a place for their nail polish and some of their hair products.
When spacing the shelves, I left 8 inches between the bottom shelf and the second shelf. The remaining shelf spaces are 6 inches apart.
The open design makes it easy to see the nail polish colors, and the little front edges help keep everything in place.
I love how this simple DIY added storage while giving all those little bottles a place of their own!
More Ways to Use This DIY Storage Shelf
Although I originally made this shelf for bathroom storage, the design could be useful in other areas of your home, too.
- Craft room: Store small paint bottles, brushes, and craft supplies.
- Beauty station: Organize nail polish, hair products, and other small beauty items.
- Kids’ room: Keep small collections and frequently used supplies organized.
- Hobby area: Display small jars, bottles, or supplies you want to keep within easy reach.
You can adjust the paint color and what you store on the shelves to make this project work for your space.
If you’re looking for a simple way to organize nail polish and free up a little bathroom counter space, this DIY shelf is a fun project to try!
More Organization DIY Projects
Check out these other organization posts from my fellow bloggers.

I love this idea! I have looked at a lot of different items to organize my daughter’s bathroom, but none were quite what I was looking for. This one is perfect! The design is very simple and adorable. My daughter will also love it. Thanks for sharing this project. Cheers
What a great idea! I have so much nail polish I don’t know what to do with it all, but this would be perfect!
What a creative idea!!! Thanks so much for joining us at #merrymonday
Wow, that’s a lot of nail polish, ha ha! I love this project and could think of a number of places I could use it. Thanks for sharing on the #HomeMattersParty – I hope you will join us, next week.
This is a super cute idea! I think I will make one very soon 🙂
Wandering over from the DIY like a boss link party… Looks like I will be hanging around your blog for a while… 🙂
This is awesome! I wish I had somewhere for one of these in my home! Thanks for sharing at The DIY Collective. Pinned it!
I bet this really helps keep all those nail polishes corralled in one spot, a perfect storage solution! XO
such a smart way to build a shelf with the wall as backing! love the color you chose Maryann!
This is invaluable, Maryann! I could be used for so many things. Great project! 🙂
That is a fantastic solution to corral all of those bottles! And I love the color that you painted it.
Your shelf is super cute, perfect way to organize your polish collection!
This is perfect for organizing your teen’s beauty supplies. It’s also handy to have the products where the girls can see them and easily get to them when they are getting ready in the morning. We have tiny bathrooms in my house and a project like this would free up some up my precious cabinet space.
thats great. i used a spice rack added a back, for my polish.however its not quite big enough.
Fun organization project Maryann! We sure do collect a lot of stuff, don’t we?
Your “stuff” looks so pretty and organized!
pinning!
gail
This is awesome Maryann – love the paint color too! I could use one of these in my craft room to store craft paint, brushes, etc.
I love your project and wall storage is one of my favorite ways to use space! What a great way to keep teens and nail polish organized. I remember how cluttered having lots of nail colors was when my girls were teens, wish I’d have known then what I know now…famous last words, right?
Really cute idea, Maryann! This would be perfect for my daughter’s stash of nail polish!